Apartment composter: when my earthworms recycle my waste
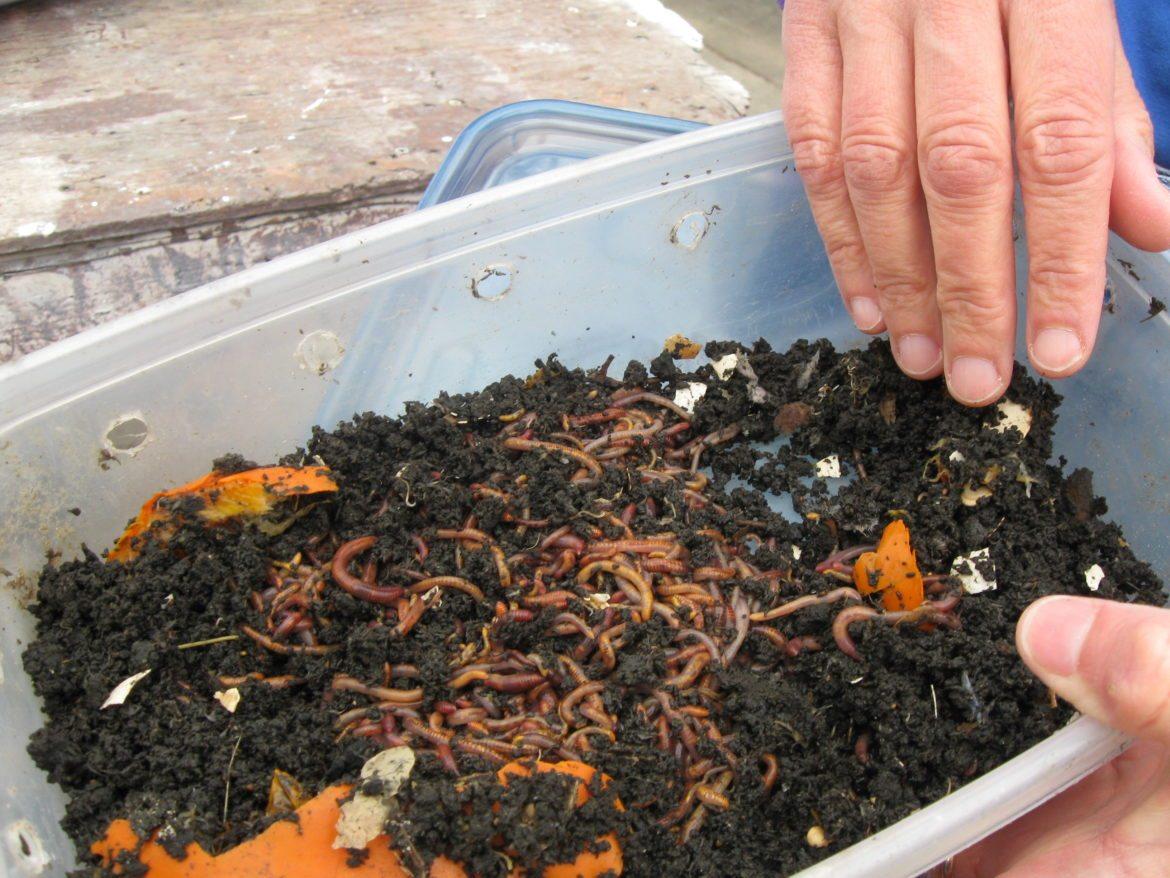
If the idea of hosting a colony of earthworms in your apartment puts you off, rest assured: nothing could be more normal! But by agreeing to test this 100% green solution to reduce your ecological footprint, there is a good chance that you will change your point of view on these little critters. The vermicomposter, made up of several bins stacked on top of each other in which the worms transit, has the advantage of being very simple and economical to implement and of emitting no odor. Offer your leftovers and peelings to the earthworms: they transform them into compost, which you can use for your plants. An exchange of good practices, in short!
Building your own composter
Two options are available to you to start: buy a ready-made composter (from 100 €) or if you are a little handyman, build it yourself . You can either make it entirely out of wood, or from polystyrene containers recovered, for example, from greengrocers. For this second option, plan three bins of the same size and a fourth higher. The first, the one at the bottom, will collect the most liquid element resulting from the transformation process, the juice. The second, placed just above, must be pierced with small holes that will not let the worms pass, it is in this one that your compost will be. The third, on the contrary, must be pierced with larger holes, about ten centimeters in diameter, and covered with wire mesh (chicken wire type). The fourth must be higher than the others, it is in this one that you will deposit your waste.
Finding the worms
Now we'll have to move on to the most important thing and populate your composter! Know that only two species of worms can enjoy it: Eisena Fetida and Eisena Andrei - but not together. Going out with your bucket and shovel in search of worms is not the most effective way to find your future earthworms, because you will have no way of knowing if you are finding the right species. The best thing is to get in touch with donors: there is indeed a large community of vermicomposter users who offer to help novices and donate worms. On the site www.plus2vers.com, you will easily get in touch with them. You can also buy some, for ten euros per hundred grams, knowing that you will need at least 200 grams to start. In the upper tray, prepare the "litter" for your future companions, with brown cardboard, type rolls of toilet paper and box of eggs, untreated potting soil, coffee grounds, and wet everything. This layer should be about 5 cm and cover the entire surface of the tray. This is where you will put your leftovers.
Good balanced meals for my colony!

Start feeding your worms two weeks after setting them up, to give them time to settle in. Your waste must be cut into small pieces and introduced very gradually. Allow two months for the system to launch, six months for it to find its cruising speed. Indeed, worms are interested in your leftovers when they have already been decomposed by fungi and molds. The process is long at first, and is self-sustaining thereafter. Waste authorized and appreciated by these critters: peelings of fruit and vegetables, leftover raw or cooked but natural vegetables and fruit - no sauce! -, tea (including with the sachet), coffee grounds and filters, crushed eggshells, bread, pasta, rice, flour... Prohibited in their diet: onion, garlic, leek white, citrus fruits, meat and fish.
Important: you will need to add cardboard very regularly to absorb the humidity.
A few tips for a good cohabitation
Worms are afraid of hot weather, but their habitat can be moved depending on the season. For example, if you have your vermicomposter on your balcony but it faces south, do not hesitate to bring it in during the summer. Avoid sticking it completely to a wall, earthworms do not particularly appreciate vibrations (nearby washing machine prohibited!). Another mistake not to make: give them too much to eat. You can go on vacation without any problem for three weeks without them starving, but don't forget to add cardboard, there is never too much. And on your return, incorporate your waste gradually to reaccustom them gently.
To try the vermicomposter is to adopt it!
In Toulouse, Emilie and Renaud have made their own vermicomposter by recycling. And they quickly fell in love with those who almost became pets. "We spent a lot of time observing their behavior, it's very instructive. Yet we knew nothing about it!" Having become specialists in the matter, they make donations regularly via the community site and provide good advice there. "We noticed that the compost should give off a smell of undergrowth, of humus. If it smells bad, that's not normal, it's because there's too much organic matter and you have to add cardboard and paper. It's all about proportion." They know by heart the life of this small ecosystem which provides them with many services, because, consuming a lot of vegetables, the reduction of their green waste has been considerable. "And in addition, our trash can smells less bad."


Find out how to remove the tartar on your dog's teeth
Under what conditions can you have an inflatable jacuzzi on its terrace or balcony?
Grass mower a perfect lawn!
What are the measures in the dart game